Navigationsmenü
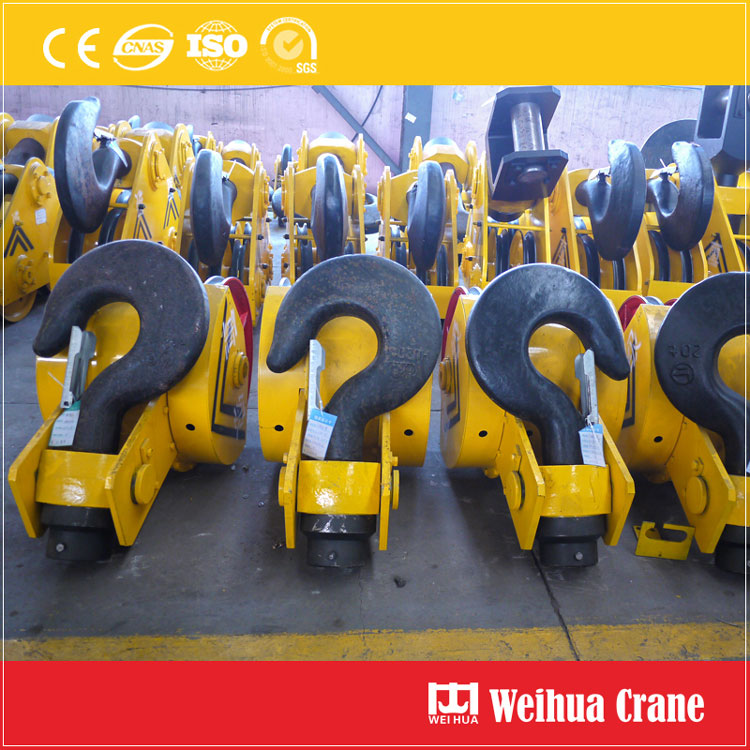
Der Kranhaken. Es ist das scheinbar Einfache, dennoch absolut kritisch, Verbindungspunkt zwischen Ihrem Kran und seiner Last. A ist gescheitert Kranhaken bedeutet nicht nur Ausfallzeit; es kann zu katastrophalen Unfällen führen, Verletzungen, Todesfälle, und erheblicher Sachschaden. Eine regelmäßige und gründliche Inspektion von Kranhaken ist nicht nur eine gute Praxis, sondern ein nicht verhandelbares Sicherheitsgebot.
Dieser Leitfaden beschreibt die wesentlichen Schritte für eine ordnungsgemäße Kranhakenprüfung, Dies umfasst sowohl häufige Kontrollen vor der Verwendung als auch detailliertere regelmäßige Inspektionen. Beachten Sie stets die spezifischen Anweisungen des Herstellers und die einschlägigen Sicherheitsvorschriften (Wie OSHA, ASME B30.10, ISO 9927-1, oder lokale Äquivalente) für Ihre Ausrüstung.
Verhindert Fehler: Haken sind einer enormen Belastung ausgesetzt, Biegen, und tragen. Mit der Zeit können sich Ermüdungsrisse oder Verformungen bilden.
Identifiziert Verschleiß & Schaden: Bei normalem Gebrauch kommt es zu einer Abnutzung des Sattels, Schaft, und verriegeln (falls ausgestattet). Auch durch Überlastung kann es zu Schäden kommen, Auswirkungen, oder Umweltfaktoren.
Gewährleistet Ladungssicherheit: Ein verformter Haken oder ein defekter Riegel können dazu führen, dass die Ladung unerwartet verrutscht oder sich löst.
Einhaltung: Regelmäßige dokumentierte Inspektionen sind in der Regel gesetzlich und versicherungspolitisch vorgeschrieben.
Vorbenutzung / Häufige Inspektion: Wird täglich oder vor jeder Schicht durch den Bediener oder benanntes Personal durchgeführt. Schnelle Sicht- und Funktionsprüfung.
Periodisch / Regelmäßige Inspektion: Monatlich durchgeführt, vierteljährlich, oder jährlich (wie in den Vorschriften festgelegt, Hersteller, und Nutzungsschwere) durch einen kompetenten und qualifizierten Prüfer. Detaillierter, kann Messungen und Reinigung erfordern.
Umfassend / Große Inspektion: Detaillierte Demontage und Untersuchung, erfordern oft Fachpersonal und zerstörungsfreie Prüfungen (Nicht-zerstörerische Tests), in der Regel jährlich oder wie angegeben.
Isolieren Sie den Kran: Sperre/Tagout (HERZ) die Stromquelle des Krans. Stellen Sie sicher, dass es nicht mit Strom versorgt werden kann.
Senken Sie den Haken: Positionieren Sie die Hakenflasche sicher auf Bodenhöhe oder in einem dafür vorgesehenen Inspektionsbereich.
Reinigen Sie den Haken: Überschüssigen Schmutz entfernen, Fett, oder Farbablagerungen, die Mängel verbergen könnten. Eine Drahtbürste ist oft hilfreich. Vorsicht: Entfernen Sie schützende Schmierstoffe nicht in Verschleißbereichen, es sei denn, dies wird zur Inspektion vorgeschrieben.
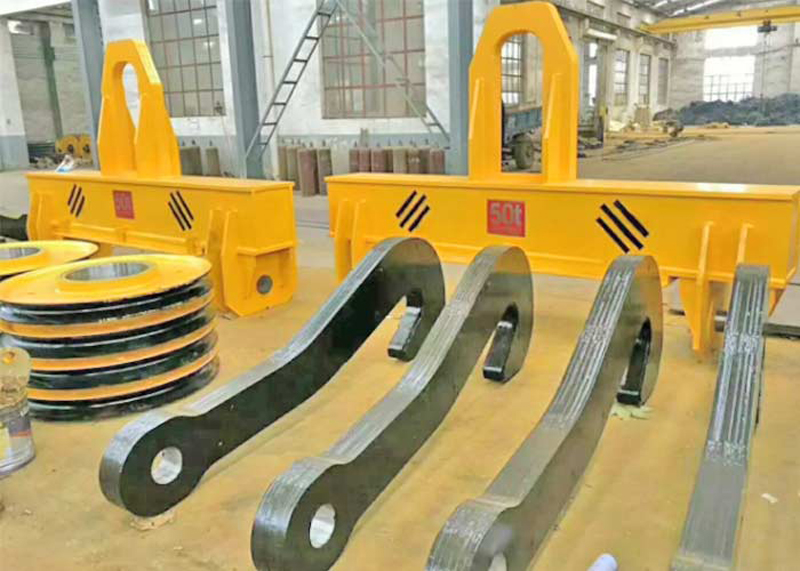
Sammeln Sie Werkzeuge: Gute Beleuchtung (Taschenlampe!), Inspektionsspiegel, Lupe, Messschieber oder Hakenlehren (um Verschleiß/Verformung zu messen), Verschleißlehre für den Riegel (gegebenenfalls), und Dokumentationsformulare.
Risse: Der #1 Kritischer Defekt. Untersuchen Sie den GESAMTEN Haken sorgfältig, besonderes Augenmerk auf stark beanspruchte Bereiche legen:
Inside the “Saddle” (Schüssel/Hals): Die gekrümmte Innenfläche, auf der die Last sitzt. Verwenden Sie einen Spiegel, um alle Bereiche zu sehen. Suchen Sie nach Haarrissen, insbesondere von der Innenfläche ausstrahlend.
Schaft (Bereich unterhalb des Sattels): Überprüfen Sie beide Seiten und die Oberseite, wo sie auf das Drehgelenk oder die Mutter trifft.
Hakenspitze (Punkt):
Basis des Hakens (Wo Schaft auf Auge/Unterlegscheibe/Mutter trifft): Ein erstklassiger Ort für Ermüdungsrisse.
Tragen:
Sattel (Halsöffnung): Messen Sie die Verschleißtiefe. Vergleichen Sie es mit der Originalabmessung (oft auf dem Haken oder in Handbüchern eingeprägt). Kritisch: Tragen Sie mehr 10% (oder Herstellerlimit, oft 5-15%) Der ursprüngliche Halsöffnungsdurchmesser erfordert in der Regel einen Austausch. Verwenden Sie Hakenlehren oder Messschieber.
Hakenspitze: Übermäßiger Verschleiß kann die Festigkeit verringern und die Funktion des Schlosses beeinträchtigen.
Verformung (Biegen, Verdrehen):
Twist: Schauen Sie am Schaft entlang zur Spitze. Die Spitze sollte im Schaft zentriert sein. Jede spürbare Verdrehung ist inakzeptabel.
Biegung/Öffnung: Vergleichen Sie die tatsächliche Hakenöffnung (Abstand zwischen Spitze und Schaft) zur ursprünglichen Spezifikation. Die Öffnung nimmt darüber hinaus zu 15% (oder Herstellerlimit, oft 5-15%) ist gefährlich. Verwenden Sie Messgeräte oder Messschieber.
Gerader Schaft: Der Schaft sollte gerade sein, nicht gebogen oder gebogen.
Korrosion & Lochfraß: Starke Korrosion oder tiefe Lochfraßbildung schwächt den Haken erheblich. Leichter Oberflächenrost kann gereinigt und überwacht werden, Aber erhebliche Lochfraßbildung erfordert eine Beurteilung durch eine qualifizierte Person. Achten Sie auf Korrosion unter dem Lack.
Furchen, Nicks, & Rillen: Tiefe Oberflächenschäden wirken als Spannungskonzentrator, kann möglicherweise zu Rissen führen. Bewerten Sie Tiefe und Standort.
Lackzustand: Peeling, abblätternd, oder blasenbildende Farbe könnte weisen auf eine zugrunde liegende Korrosion hin. Es kann auch Risse verbergen. Bereiche, die neu gestrichen werden müssen, sollten zunächst gereinigt und inspiziert werden.
3. Funktionsprüfung (Für Haken mit Riegel):
Latch-Präsenz & Typ: Achten Sie auf den richtigen Riegeltyp (federbelastet, Schwerkraft, usw.) wie vorgesehen vorhanden und intakt ist.
Verriegelungsbetrieb:
Federverschlüsse: Sollte sich frei bewegen und beim Loslassen zwangsweise über der Hakenspitze in die geschlossene Position zurückschnappen. Federspannung prüfen.
Schwerkraftverschlüsse: Sollte frei schwingen und die Spitze unter der Schwerkraft zuverlässig abdecken.
Riegelverschleiß: Überprüfen Sie die Kontaktfläche des Riegels mit der Hakenspitze auf übermäßigen Verschleiß oder Verformung. Messen Sie den Verschleiß nach Möglichkeit anhand der Spezifikationen.
Verriegelungssicherheit: Der Riegel muss wirksam verhindern, dass Schlingen oder Hardware im geschlossenen Zustand versehentlich von der Spitze rutschen. Stellen Sie sicher, dass es sich unter leichtem Druck nicht leicht öffnen lässt.
4. Anhänge & Beschläge:
Hakenmutter/Kragen: Auf Dichtheit prüfen (keine Drehung), Risse, Verformung, und Korrosion. Stellen Sie sicher, dass es richtig sitzt.
Schwenkmechanismus (gegebenenfalls): Auf gleichmäßige Drehung ohne Blockierung prüfen, übermäßiges Spiel, oder sichtbare Schäden. Achten Sie beim manuellen Drehen auf Schleifgeräusche.
Sicherheitsverriegelungsstifte/-halter: Stellen Sie sicher, dass sie vorhanden und sicher sind.
Hakenblockscheiben: Auf Verschleiß prüfen, Risse, und sanfte Rotation (obwohl dies Teil der Blockinspektion ist, es wird oft gleichzeitig durchgeführt).
5. Dokumentation:
Befunde aufzeichnen: Dokumentieren Sie jede Inspektion (Datum, Inspektor, Kran-ID, Hook-ID), Feststellung festgestellter Mängel, Messungen vorgenommen, und ergriffene Maßnahmen (Z.B., "Bestanden,„Überwachen Sie den Verschleiß an der Stelle X,„„Aus dem Dienst genommen“).
Markieren: Wenn ein Haken die Inspektion nicht besteht, Es MUSS sofort außer Betrieb genommen werden. Kennzeichnen Sie es deutlich mit „NICHT VERWENDEN“ oder „DEFEKT“ und befolgen Sie die Anweisungen für die Reparatur/den Austausch durch qualifiziertes Personal. Schweißen Sie niemals einen beschädigten Haken und versuchen Sie niemals, ihn zu begradigen! Bei kritischen Mängeln ist Ersatz die einzig sichere Möglichkeit.

Für Trinkgeld: Wenn Zweifel über die Schwere eines Mangels bestehen, NEHMEN SIE DEN HAKEN AUSSER BETRIEB und wenden Sie sich an einen qualifizierten Kraninspektor oder Ingenieur. Spielen Sie niemals mit der Integrität des Hakens.


Die Überprüfung eines Kranhakens ist eine grundlegende Verantwortung für jeden, der an Kranarbeiten beteiligt ist. Durch die Einbeziehung gründlicher Kontrollen vor der Verwendung und die sorgfältige Befolgung geplanter regelmäßiger Inspektionen anhand dieser Checkliste, Sie erkennen potenzielle Gefahren proaktiv, bevor sie zu einer Katastrophe führen. Erinnern, Ein paar Minuten damit verbracht, diesen Haken sorgfältig zu untersuchen, könnte Leben retten, Verletzungen vorbeugen, und kostspielige Unfälle vermeiden. Machen Sie die Hakeninspektion zu einem unverzichtbaren Teil Ihrer täglichen Sicherheitsroutine.
Wir schätzen Ihr Feedback! Bitte füllen Sie das folgende Formular aus, damit wir unsere Dienste auf Ihre spezifischen Anforderungen anpassen können.


Klicken Sie auf die Schaltfläche, um Produktinformationen und Angebote auf WhatsApp zu erhalten.
Holen Sie sich Zitat

Neueste Kommentare