Riglyne vir die limiet van kraanhaak
2025-08-27
In die wêreld van swaar opheffing, Die kraanhaak is die uiteindelike eindpunt van vertroue. Dit is die enkelvoudige stuk hardeware wat u onskatbare las aan die komplekse masjinerie van die hyskraan verbind. Nog, Dit word dikwels as vanselfsprekend aanvaar. Anders as 'n verslete draadtou wat maklik is om te sien, Haakdrag kan verraderlik wees, geleidelik vorder totdat dit 'n katastrofiese risiko inhou.
Dit is nie net 'n aanbeveling om te verstaan nie.
Hierdie gids sal u deur die sleuteldragpunte lei, Hoe om hulle te meet, en die kritieke grense wat bepaal wanneer 'n haak buite werking geneem moet word.
Waarom hake misluk: Die anatomie van slytasie
'N Haak misluk hoofsaaklik weens drie redes:
- 1. Oorlading: Die nominale lasvermoë oorskry, wat plastiese vervorming kan veroorsaak (die haak buig of rek).
- 2. Uitputting: Herhaalde laai en aflaai, Selfs binne 'n gegradeerde kapasiteit, kan lei tot die ontwikkeling van krake oor tyd.
- 3. Dra en skuur: Die konstante kontak met slings, boeie, en die vrag self slyp materiaal weg, verminder die haak se dwarssnit en krag.
Dit is hierdie derde punt - kleding - wat waaksaamheidsinspeksie verg.
Sleutelareas om te inspekteer vir slytasie
Fokus u inspeksie op hierdie drie kritieke gebiede van die haak:
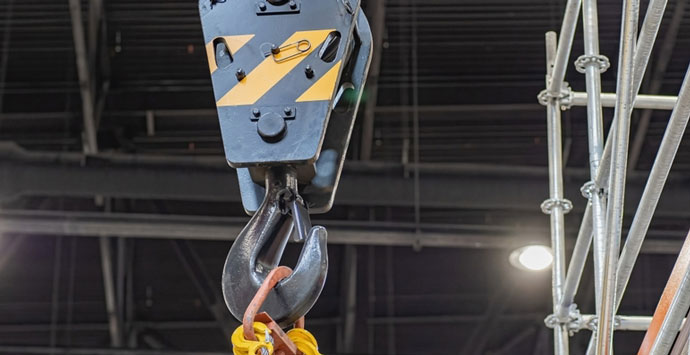
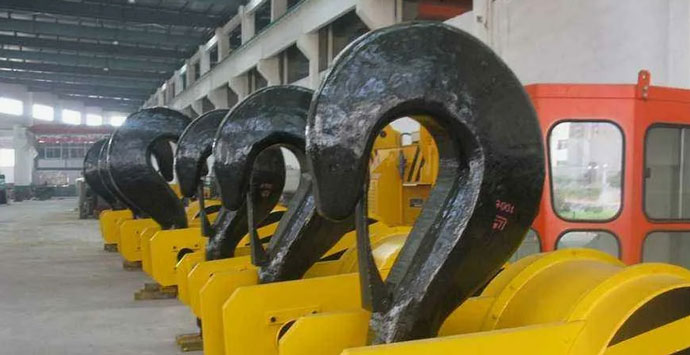
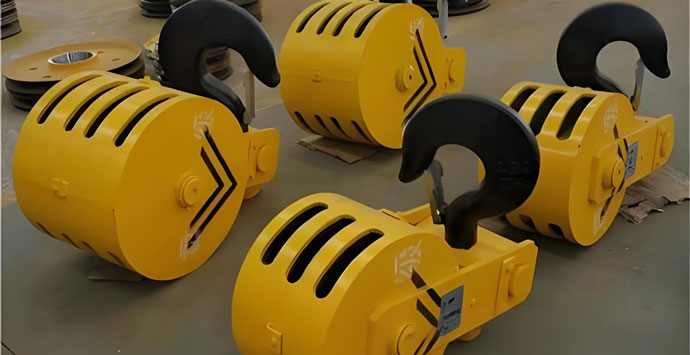
- 1. Die keel (Saal of lasdraende punt): Dit is die geboë binneste gedeelte wat die vrag direk ondersteun. Dra hier verminder die diepte van die groef en, krities, Maak die haak se keel oop, maak dit makliker vir 'n slinger om uit te gly.
- 2. Die punt (Wenk of einde): Die punt van die haak kan verslete of gebuig word van onbehoorlike gebruik (Bv., “Puntbelading” of sleep op die grond).
- 3. Die skank (Borgtog of oog): Die gebied waar die haak aan die haakblok of kraag verbind. Kyk of dit die draaiende of ander toebehore kontak, of ander toebehore.
Hoe om slytasie te meet: Die 15% Heerskappy en meer
Die mees aanvaarde riglyn vir haakdrag kom van standaarde soos ASME B30.10. Die kernbeginsel is dat 'n haak uit die diens verwyder moet word indien aan een van die volgende voorwaardes voldoen word:
1. Keelopening neem toe:
- Die reël: Enige toename in die keelopening oor 15% van die spesifikasie van die oorspronklike vervaardiger is oorsaak van verwerping.
- Hoe om na te gaan: U moet die oorspronklike dimensie ken (O) van die keelopening. Dit word gewoonlik op die haak gestempel of beskikbaar by die datablad van die vervaardiger. Meet die stroom, Verslete dimensie (W). Bereken die persentasie toename: ((W - van) / O) x 100%.
- Voorbeeld: As die oorspronklike keelopening was 4 duim, n 15% Verhoging sou wees 0.6 duim. Dus, As die huidige meting is 4.6 duim of meer, Die haak word veroordeel.
2. Dra op die vragdraende punt:
- Die reël: Dra op die vragdraende punt (die saal) moet nie meer wees nie 10% van die oorspronklike afdelingshoogte.
- Hoe om na te gaan: Dit verg 'n visuele vergelyking met die oorspronklike profiel van die haak. Baie vervaardigers bied slytasie -meters of sjablone wat spesifiek ontwerp is vir hul haakmodelle. Gebruik 'n remklap of diepte, U kan die diepte van die verslete groef meet en dit met die oorspronklike vergelyk.
3. Vervorming, Draai, of kraak:
- Die reël: Enige sigbare draai, buig, of krake is 'n onmiddellike oorsaak van verwerping. 'N Haak wat gebuig of gedraai is, is onder abnormale spanning en is baie onvoorspelbaar.
- Hoe om na te gaan: Inspekteer die haak van die kant af. Die punt van die haak moet in lyn wees met die middellyn van die skink. Enige afwyking dui op buiging. Gebruik 'n magnetiese deeltjie -toets (MPI) of kleurstofdeurdringende toets (DPI) om verborge oppervlakkrake te vind.
4. Korrosie en pitting:
-
Alhoewel dit nie streng dra nie,”Diep korrosie en pitting kan die strukturele integriteit van die haak aansienlik verminder deur streskonsentrasiepunte te skep. As pitting ernstig genoeg is om die krag van die haak in die gedrang te bring, dit moet vervang word.
'N Eenvoudige inspeksie -kontrolelys
Voor elke skof, Voer 'n basiese visuele inspeksie uit. Voor elke hysbak, Doen 'n funksionele tjek. Gereeld, 'N Gedokumenteerde inspeksie moet deur 'n bevoegde persoon uitgevoer word.
- 1. Kyk vir etikette: Is die haak gemerk met sy nominale kapasiteit? Is dit leesbaar?
- 2. Visuele skandering: Soek voor die hand liggende draaie, draaie, of diep krake.
- 3. Keelopening: Lyk die opening wyer as normaal? (Gebruik meetinstrumente vir die formele inspeksie).
- 4. Dra groef: Is daar 'n diep?, gepoleerde groef gedra in die saal?
- 5. Haaknik: As dit toegerus is, funksioneer die grendel korrek, Nie gedra nie, en nie gespring nie? 'N beskadigde grendel is 'n groot veiligheidsgevaar.
- 6. Draaimeganisme: Draai die haak vry sonder oormatige spel of binding?
Die riglyne hierbo is 'n fondament, Maar stel altyd die spesifikasies van die oorspronklike vervaardiger uit, aangesien hulle soms meer konserwatief kan wees.
Daar is nie iets soos 'n 'effens veilige' haak nie. Die koste van 'n nuwe haak is weglaatbaar in vergelyking met die koste van 'n mislukte hysbak - wat toerustingskade kan insluit, Projekvertragings, Omgewingsskade, en die belangrikste, lewensverlies.
Maak haakinspeksie 'n nie-onderhandelbare deel van u hefroetine. Lei u span op, Gebruik die regte gereedskap, en kweek 'n kultuur waar iemand 'n twyfelagtige haak sonder huiwering kan-en moet-. Dit is die sterkste skakel in u veiligheidsketting.


Nuutste kommentaar