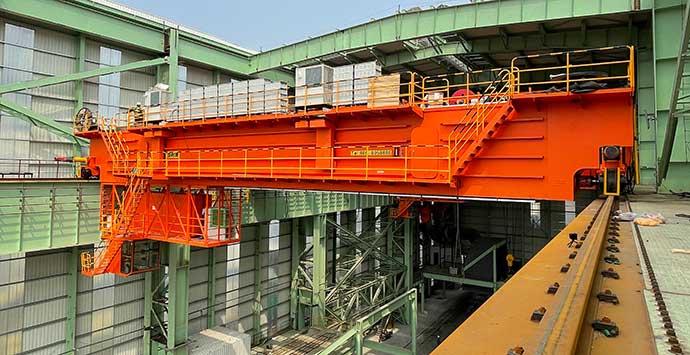
Dalam hal penanganan material tugas berat, keselamatan, stabilitas, dan efisiensi derek sangat bergantung pada kualitas pemasangan dan peletakan jalurnya. Bahkan penyimpangan pada tingkat milimeter pun dapat menyebabkan masalah yang parah—mulai dari keausan roda dini dan getaran yang berlebihan hingga tergelincirnya rel secara fatal.. Baik Anda memasang jalur derek di atas kepala, rel gantry crane, atau sistem monorel, mematuhi spesifikasi yang ketat tidak dapat dinegosiasikan. Di blog ini, kami akan merinci persyaratan rincinya, prosedur langkah demi langkah, toleransi utama, dan praktik terbaik untuk memastikan sistem jalur derek Anda beroperasi dengan andal selama bertahun-tahun yang akan datang.
1. Persiapan Pra-Instalasi: Meletakkan Fondasi untuk Sukses
Sebelum jalur apa pun dipasang, persiapan menyeluruh sangat penting untuk menghindari pengerjaan ulang yang mahal dan bahaya keselamatan. Fase ini menetapkan tahapan untuk pemasangan yang presisi dan kinerja jangka panjang.
1.1 Pemeriksaan Bahan dan Komponen
Mulailah dengan memverifikasi kualitas semua komponen untuk memastikannya memenuhi standar industri dan persyaratan desain:
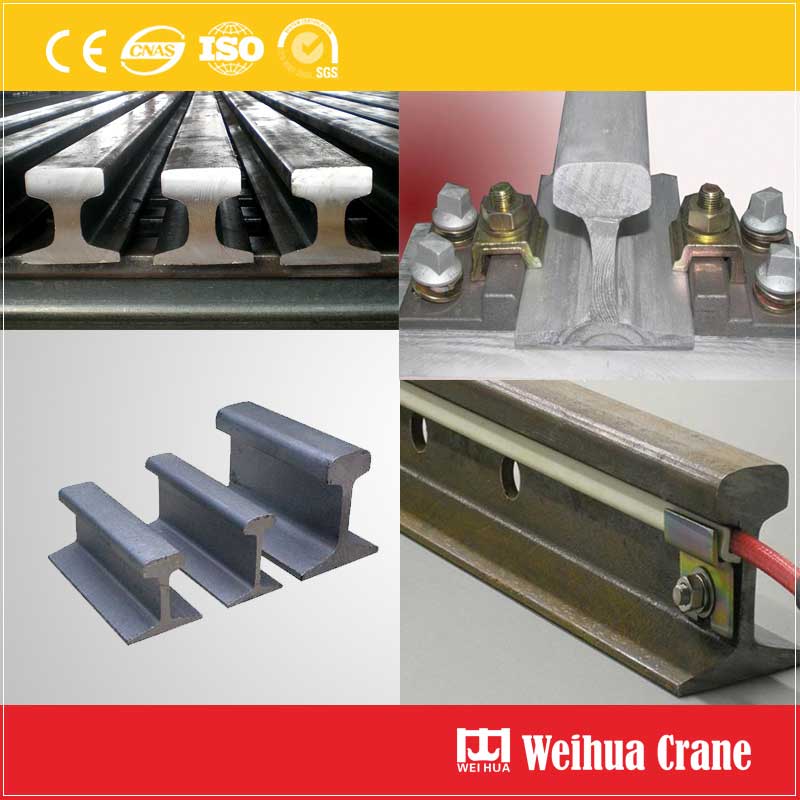
- ◆ Kualitas Kereta Api: Periksa rel (MISALNYA., Rel khusus derek tipe QU, Rel kereta api tipe P, atau rel baja persegi) untuk cacat yang terlihat seperti retak, gelembung, inklusi, atau permukaan terkelupas. Untuk rel GB QU70, Misalnya, periksa dimensi (tinggi, lebar, radius kepala) dan konfirmasikan materinya (biasanya U71Mn) memenuhi spesifikasi. Pastikan permukaan rel bebas dari karat atau kerusakan berlebih, karena hal ini dapat mengganggu distribusi beban.
- ◆ Pengencang: Periksa klem track, baut, piring ikan (pelat sambungan), mesin cuci, dan bantalan elastis. Pengencang harus bebas dari deformasi, korosi, atau kerusakan benang. Untuk baut berkekuatan tinggi, verifikasi bahwa mereka memenuhi persyaratan torsi yang ditentukan dalam JGJ 82 (Kode untuk Desain, Konstruksi dan Penerimaan Sambungan Baut Kekuatan Tinggi pada Struktur Baja).
- ◆ Struktur Basis dan Pendukung: Periksa balok rel derek (beton atau baja) untuk pemukiman, kecenderungan, celah, atau deformasi. Untuk balok baja, periksa vertikalitas bentang tengah (≤ jam/500, di mana h adalah tinggi balok), tikungan samping horizontal (≤l/1500, maksimal 10mm), dan lengkungan vertikal (≤10mm). Penyimpangan antara posisi tengah balok dan sumbu desain tidak boleh melebihi 5 mm. Untuk balok beton, pastikan permukaannya rata dan kokoh, dengan kesalahan kerataan ≤2mm per meter.
1.2 Persiapan Alat dan Perlengkapan
Lengkapi tim Anda dengan alat yang tepat untuk memastikan presisi dan keamanan:
- ◆ Alat Ukur: Teodolit, tingkat, pengintai laser, jangka sorong (akurasi 0,02mm), pengukur kegagalan, 1m penggaris baja, dan kawat baja yang dikencangkan (dengan penegang) untuk pemeriksaan kelurusan. Untuk pengukuran rentang, gunakan pita baja dengan skala pegas untuk mengontrol tegangan, memastikan pembacaan yang akurat.
- ◆ Alat Instalasi: Kunci torsi (untuk pengencangan baut yang presisi), palu godam, linggis, penggiling portabel, peralatan las (untuk penyambungan rel), dan dongkrak hidrolik (untuk penyesuaian rel).
- ◆ Peralatan Keamanan: Sabuk pengaman kait ganda, sepatu anti selip, topi keras, pita peringatan, walkie-talkie, dan alat pemadam kebakaran. Untuk pekerjaan di ketinggian, memastikan perancah dipasang dengan aman dan diperiksa sebelum digunakan.
1.3 Persiapan Keamanan
Prioritaskan keselamatan dengan langkah-langkah penting ini:
- ◆ Matikan dan putuskan aliran listrik derek, menggantungkan tulisan “Dilarang Menutup, Tanda Tangan People Working” di panel kontrol untuk mencegah pengaktifan yang tidak disengaja.
- ◆ Isolasi area kerja dengan pita peringatan untuk mencegah masuknya orang yang tidak berkepentingan. Di lingkungan multi-derek, menggunakan penghalang fisik untuk mencegah derek yang berdekatan memasuki zona kerja.
- ◆ Lakukan pengarahan keselamatan untuk semua anggota tim, memperjelas tugas, bahaya (MISALNYA., perpindahan rel, benda jatuh), dan tindakan pengendalian. Pastikan semua pekerja memiliki sertifikat pengoperasian peralatan khusus atau kualifikasi kerja yang valid.
2. Spesifikasi Instalasi Utama: Eksekusi Langkah demi Langkah
Dengan persiapan yang selesai, ikuti langkah-langkah terperinci ini untuk memastikan pemasangan trek yang tepat, fokus pada keselarasan, pengancing, dan penanganan bersama.
2.1 Tata Letak dan Pemosisian
Tata letak yang akurat adalah dasar dari penyelarasan lintasan yang tepat. Ikuti panduan ini:
- ◆ Menggunakan sumbu posisi balok derek sebagai referensi, tandai garis tengah lintasan pada struktur pendukung. Untuk derek di atas kepala, tandai titik-titik setiap 2m sepanjang balok (dan di setiap kolom) untuk membuat garis referensi yang jelas. Untuk sistem monorel, pastikan garis tengah sejajar dengan jarak sumbu roda derek untuk menghindari tekanan lateral.
- ◆ Tetapkan titik referensi di kedua ujung dan tengah lintasan untuk mengontrol ketinggian dan kerataan. Kesalahan ketinggian titik referensi harus berada dalam ±1mm. Untuk gantry crane, deviasi antara garis tengah lintasan dan garis acuan harus dikontrol secara ketat untuk mencegah kemiringan.
2.2 Pemasangan dan Penyelarasan Rel
Penempatan dan penyelarasan rel yang tepat sangat penting untuk mencegah derek “menggerogoti” (keausan flensa roda) dan getaran. Patuhi toleransi dan langkah-langkah ini:
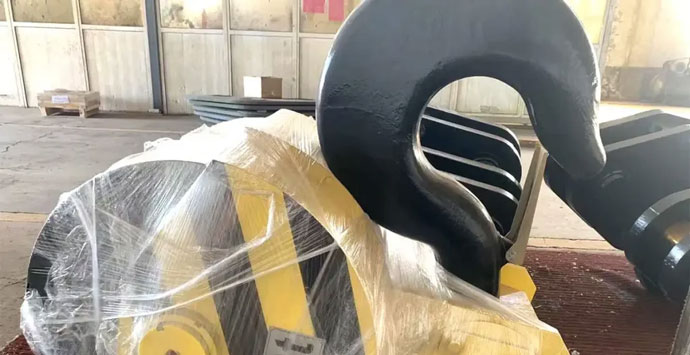
- ◆ Pengangkatan Rel: Gunakan derek (MISALNYA., 8t truk derek) untuk mengangkat rel ke balok penyangga, menempatkan balok kayu setebal 20mm di bawah rel untuk melindungi permukaan. Pastikan rel stabil selama pengangkatan untuk menghindari benturan dan deformasi.
- ◆ Pemasangan Bantalan Elastis: Letakkan bantalan elastis di bawah rel untuk menyerap getaran dan mengurangi keausan. Lebar bantalan harus 10-20mm lebih lebar dari bagian bawah rel, dan panjangnya harus melebihi 100mm jika jarak antara rel dan balok melebihi 200mm. Jangan gunakan lebih dari 3 lapisan bantalan di titik mana pun, dan pastikan bantalan dilas dengan aman ke balok penyangga jika perlu.
- ◆ Penyesuaian Penjajaran:
- ◆ Kelurusan: Tarik kawat baja yang dikencangkan sepanjang lintasan dan ukur jarak antara kawat dan sisi rel. Penyimpangan tidak boleh melebihi 1,5 mm per segmen 6 m, dan kesalahan kelurusan total pada panjang penuh harus ≤5 mm. Gunakan dongkrak hidrolik dan alat khusus untuk koreksi dingin jika terdeteksi adanya pembengkokan.
- ◆ Deviasi Rentang: Untuk derek jembatan, rentang (jarak antara dua garis tengah lintasan) deviasi yang diperbolehkan adalah ±5mm hingga ±10mm, tergantung pada panjang bentangnya. Ukur ujung dan tengah tiap ruas lintasan dengan menggunakan kawat baja yang dikencangkan (10-15berat kg) atau teodolit. Sesuaikan posisi rel melalui klem jika penyimpangan melebihi batas.
- ◆ Perbedaan Ketinggian: Gunakan level untuk mengukur perbedaan ketinggian antara dua rel pada penampang yang sama. Untuk sebagian besar aplikasi, perbedaan ini tidak boleh melebihi 10mm (5mm untuk derek presisi tinggi). Sesuaikan menggunakan shim (sesuai dengan spesifikasi desain) jika diperlukan.
2.3 Penanganan Sambungan Rel
Sambungan rel adalah titik kegagalan yang umum, jadi penanganan yang tepat sangat penting untuk menghindari beban benturan dan ketidaksejajaran:
- ◆ Kesenjangan Bersama: Sediakan celah ekspansi termal antar bagian rel. Di lingkungan yang dingin (di bawah 20°C), jaraknya harus 1-2mm; dalam kondisi yang lebih hangat (di atas 20°C), itu harus 4-6mm. Kesenjangan yang terlalu kecil dapat menyebabkan rel tertekuk di musim panas, sementara jarak yang terlalu besar menyebabkan benturan yang parah pada roda.
- ◆ Ketidaksejajaran Sendi: Gunakan penggaris baja 1m untuk memeriksa vertikalitas (tinggi) dan horisontal (samping) ketidaksejajaran pada sendi. Keduanya tidak boleh melebihi 1 mm. Giling ujung rel jika terdeteksi ketidaksejajaran, dan pastikan pelat ikan terpasang erat tanpa celah. Untuk sambungan las, periksa apakah ada keretakan, pori-pori, atau fusi tidak lengkap, dan memastikan lasan mulus dan bertransisi mulus dengan permukaan rel.
- ◆ Pengikatan Sambungan: Kencangkan sambungan dengan pelat ikan dan baut berkekuatan tinggi, tightening them to the specified torque (MISALNYA., 250N·m untuk baut M20). Periksa baut yang kendor secara teratur, karena getaran dapat mengurangi torsi seiring waktu.
2.4 Pengikatan dan Fiksasi
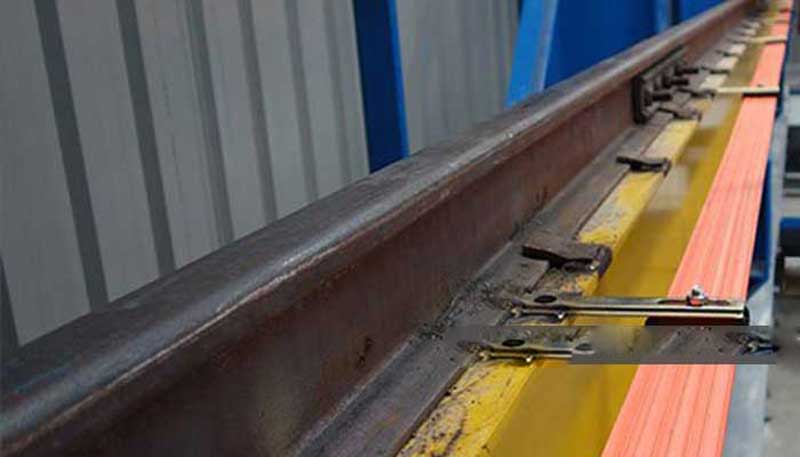
Lacak klem (tetap atau dapat disesuaikan) digunakan untuk mencegah perpindahan lateral dan longitudinal. Ikuti aturan ini:
- ◆ Klem harus dipasang dengan jarak tidak lebih dari 200mm, memastikan rel dipegang dengan kuat tanpa merusak permukaan. Area kontak antara klem dan rel harus minimal 60% dari permukaan kontak nominal.
- ◆ Kencangkan baut menggunakan kunci torsi sesuai spesifikasi pabrikan. Hindari mengencangkan secara berlebihan (yang dapat merusak rel) atau kurang mengencangkan (yang memungkinkan pergerakan). Terapkan jadwal pemeriksaan torsi untuk menjaga integritas pengikat.
- ◆ Pasang pemberhentian akhir (membingungkan) di ujung lintasan untuk mencegah derek tergelincir. Pastikan penahan ujung dilas atau dibaut dengan aman ke struktur pendukung.
3. Inspeksi dan Pengujian Pasca Instalasi
Setelah instalasi, inspeksi komprehensif diperlukan untuk memverifikasi kepatuhan terhadap spesifikasi dan memastikan pengoperasian yang aman. Dokumentasikan semua hasil untuk referensi di masa mendatang.
3.1 Inspeksi Visual dan Fisik
- ◆ Periksa pengencang yang longgar, rel yang tidak sejajar, atau komponen rusak. Pastikan permukaan rel bersih (bebas minyak, debu, atau puing-puing) dan bantalan elastis berada pada posisi yang benar.
- ◆ Periksa lasan (jika digunakan) untuk cacat menggunakan pemeriksaan visual atau pengujian non-destruktif (Ndt) metode seperti pengujian penetran pewarna untuk retakan kecil. Untuk aplikasi kritis, gunakan pengujian ultrasonik untuk mendeteksi kelemahan internal.
3.2 Pengukuran Presisi
- ◆ Periksa kembali parameter utama: menjangkau, kelurusan, perbedaan ketinggian, dan keselarasan sendi. Pastikan semua toleransi berada dalam batas yang ditentukan (lihat GB/T 3811, GB 6067, atau GB 50278 untuk standar industri).
- ◆ Uji pergerakan derek di sepanjang lintasan. Dengarkan suara-suara yang tidak normal (MISALNYA., menggiling, ciut) dan periksa getaran yang berlebihan. Jika “menggerogoti” terdeteksi, periksa kembali keselarasan dan sesuaikan sesuai kebutuhan.
3.3 Dokumentasi
Catat semua hasil pemeriksaan, termasuk pengukuran, spesifikasi komponen, dan penyesuaian apa pun yang dilakukan. This documentation serves as a baseline for future maintenance and compliance audits.
4. Spesifikasi Perawatan: Perpanjang Umur Lintasan
Perawatan yang tepat sama pentingnya dengan pemasangan untuk memastikan kinerja jangka panjang. Terapkan strategi pemeliharaan preventif untuk menghindari waktu henti yang tidak direncanakan dan perbaikan yang mahal.
4.1 Inspeksi Harian
- ◆ Bersihkan permukaan lintasan setiap hari untuk menghilangkan kotoran, minyak, atau salju—hal ini dapat menyebabkan roda tergelincir dan keausan tidak merata. Gunakan sikat kawat atau pembersih khusus untuk noda membandel.
- ◆ Periksa baut yang kendor, klem yang rusak, atau keausan permukaan rel. Fokus pada area dengan stres tinggi (MISALNYA., zona pengereman derek) tempat keausan paling sering terjadi. Jika keausan bagian atas rel melebihi 10% dari ukuran asli atau keausan samping melebihi 15%, penggantian jadwal.
4.2 Perawatan Berkala (Bulanan/Triwulanan)
- ◆ Periksa kembali kesejajaran dan torsi: Gunakan alat penyelarasan laser untuk memverifikasi kelurusan dan bentang, dan kencangkan kembali baut sesuai torsi yang ditentukan. Ganti pengencang yang berkarat atau rusak.
- ◆ Periksa sambungan rel dan las dari keretakan atau keausan. Giling permukaan kasar dan las kembali jika perlu. Periksa bantalan elastis dari penuaan atau kerusakan dan gantilah untuk menjaga penyerapan getaran.
- ◆ Lumasi permukaan lintasan (khususnya bidang kontak roda-rel) dengan gemuk rel khusus untuk mengurangi gesekan dan keausan. Lumasi setiap 100-200 jam kerja atau minimal seminggu sekali, tergantung pada frekuensi penggunaan.
4.3 Pemeliharaan Jangka Panjang (Tahunan)
Lakukan pemeriksaan menyeluruh menggunakan metode NDT untuk mendeteksi keretakan atau kelelahan rel internal. Evaluasi struktur pendukung untuk penurunan atau deformasi dan sesuaikan lintasan jika diperlukan. Replace severely worn or damaged rails in accordance with installation specifications.
5. Kesalahan Umum yang Harus Dihindari
Bahkan kesalahan kecil saat instalasi dapat menyebabkan masalah besar. Waspadai kendala umum berikut ini:
- ◆ Mengabaikan kesenjangan ekspansi termal: Hal ini menyebabkan rel tertekuk di musim panas atau benturan berlebihan di musim dingin.
- ◆ Penjajaran yang tidak memadai: Penyimpangan tingkat milimeter menyebabkan keausan roda dini dan “menggerogoti,” mengurangi umur rel dan roda.
- ◆ Pengencang kurang kencang: Getaran mengendurkan baut seiring waktu, menyebabkan pergerakan kereta api dan ketidakstabilan.
- ◆ Melewatkan inspeksi pra-instalasi: Rel atau struktur pendukung yang rusak akan rusak sebelum waktunya, bahkan dengan instalasi yang tepat.
- ◆ Mengabaikan pemeliharaan: Pemeliharaan reaktif (perbaikan setelah kegagalan) lebih mahal dibandingkan pemeliharaan preventif dan meningkatkan risiko keselamatan.
Pikiran Terakhir
Pemasangan dan peletakan jalur derek adalah tugas presisi yang memerlukan kepatuhan ketat terhadap spesifikasi, perhatian terhadap detail, dan komitmen terhadap keselamatan. Dengan mengikuti langkah-langkah yang diuraikan dalam blog ini—mulai dari persiapan pra-pemasangan hingga pengujian pasca-pemasangan dan pemeliharaan berkelanjutan—Anda dapat memastikan sistem jalur derek Anda beroperasi dengan aman, secara efisien, dan andal. Ingat: akurasi tingkat milimeter saat ini mencegah kegagalan besar di masa depan.
Baik Anda menginstal sistem baru atau mempertahankan sistem yang sudah ada, selalu mengacu pada standar industri (GB/T 3811, GB 6067, GB 50278) dan berkonsultasi dengan profesional yang berkualifikasi untuk mengatasi tantangan spesifik. Dengan pendekatan yang tepat, jalur derek Anda akan mendukung beban berat dan kelancaran pengoperasian selama bertahun-tahun yang akan datang.


Komentar terbaru